- Ideally, any one side of a shade sail should not be longer than 40–45 feet. Larger sails up to 70 feet are possible but can be difficult to build and install as they require very large posts and footings. We specializes in custom sizes and oversize sails.
- Long and narrow sails should be avoided. Ideally, the length of the longest side of a shade sail should not be more than twice the length of the shortest side. This is particularly true with triangle shade sails. The reason is that spreading the load along a narrow sail can be difficult.
- Triangles and other flat shade sails should slant sufficiently to prevent pooling rainwater. A slope of at least 1:6 is recommended. Larger triangles or flat sails require more of a slant to avoid sagging and facilitate shedding of rain. For Residential project – Always keep the slant away from the house to get water runoff away from the house.
- When installing square or rectangle shade sails, the strength may be increased by twisting the sail into a hyperbolic parabola which gives a three-dimensional stretch to the fabric. You can also achieve a third dimension by attaching one corner of the quadrilateral significantly higher than the other corners. This distribution of overall tension results in a stronger shade sail that lasts longer than two-dimensional shade sails exposed to the same conditions.
- Shade sails are not intended to hold snow and should be taken down where snow is a possibility.
- To avoid chafing of the fabric, overlapping shade sails should have a minimum of 12 inches of distance between them. Otherwise, windy conditions may cause the sails to rub against each other and may damage the fabric over time.
- When fixing a shade sail to a roof or building, it is very important to ensure that the attachment point is structurally strong. Many buildings are not designed to take the stresses generated by shade sails.
- Poles are generally tipped outward, away from the center of the shade sail to provide a pleasing visual look, but they may also be installed vertically.
Building Your Shade Sail Design
There are many decisions that the fabricator must make when building a shade sail and most of these decisions revolve around how to reinforce the shade sail, so it spreads out the loading forces. While there is no magic solution to this design problem, experience helps a great deal.
Here are some useful guidelines:
- We use a one-inch overlap seam for sewing panels together – using a double-needle machine for sewing the overlap seam.
- We uses the same fabric for reinforcement and orient it so it matches the bias of the underlying fabric to ensure that the reinforcement stretches uniformly with the underlying fabric.
- Pockets or Sleeves for holding the outer rope or cable should be built using the same fabric. Since these outer edges are usually curved, we cut the pocket to match the curve, sew it in with a 1/2-inch indent and then top-stitch it.
- Our pockets are usually built from two layers of material. We sew one edge of the pocket to the top of the shade sail first. Then install corner reinforcement patches to the bottom of the shade sail. Then insert the outer rope or cable and close the pocket by sewing the other edge of the pocket to the bottom of the shade sail.
- We use three layers for reinforcement patches – the largest reinforcement patch down first and sew that into place. Then the second largest patch should be installed and sewn into place. Finally, the smallest patch is installed. This last patch will have to be sewn through four layers of material so make sure your sewing machine is up to the task.
- The edge of the patch that is closest to the center of the sail should have a curved edge that is a uniform curve calculated from the center of the attachment point.
- The fabric has a bias with the most stretch going down the roll and the least stretch across the roll. When building a triangular shade sail, the bias should be aligned so the least amount of stretch is along the longest side. When designing a hypar (four-sided) shape, then the bias should be aligned so the least amount of stretch is along the ridge of the shade sail.

- We use GORE® TENARA® or Aruvo®.thread so it will outlasts any fabric.
- Any exposed edges will be cut with a hot knife to seal the fabric.
- Our smaller residential type sail will have webbing instead of cable. The webbing does not stretch much and therefore, the shade sail must be pre-stretched before webbing is sewn on or wrinkles will form. This is not seen as a viable solution on larger shade sails as it can be a difficult task.
Building Support Poles
In all cases, the size of the support poles should be calculated by an engineer.
However, there are some handy rules of thumb:
- Point load x length of pole will be roughly equal to the footing load. Example: a 1,000-lb point load on a 10’ high pole will be equal to a 10,000-lb load at the foot of the pole.
- Shade sails usually require the installation of thick-walled steel poles. These steel posts are usually powder coated, so they have a hard, long-lasting finish.
- Most shade sail posts are bolted to concrete footings that have bolts embedded in the concrete. It is common for the top of a footing to be below ground level so that the nuts attaching the pole to the footing are hidden. If there are gussets on the base of the post, these will also be hidden below ground.
- A common way to make sure the post fits the footing is to build two wooden templates that will be used for the bolt pattern.
One of these templates goes to the steel fabricator and the other template relates to the contractor building the footing. This ensures that the post will bolt up to the footing at installation time.
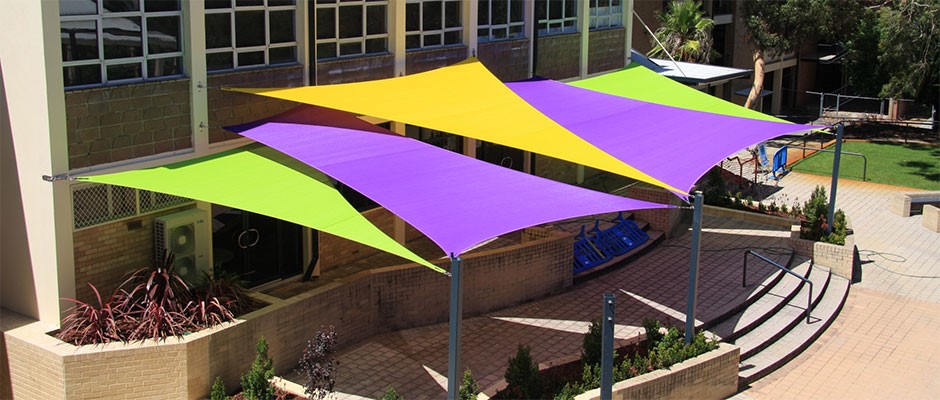
Common Shade Sail Design Layout
There are multiple ways to rig a sail shade, depending on the look, effect, and space requirements. How you want to create your custom shade sail is up to you, your client, and an experienced engineer.
Some common shade sail configurations:


Shade Sail Fabric 101

While conventional awning fabrics like Sunbrella® acrylic can be used to build a shade sail, most shade sails are built using specialized mesh material. These fabrics are specifically designed for building shade sails and have several advantages over conventional awning fabrics:
- Shade sail fabrics are mesh rather than solid fabrics, which allows water to drain through. They are often made with HDPE (High-Density Polyethylene).
- Their stretch characteristics make them easier to work with and prevent wrinkles.
- They are stronger than conventional fabrics which make them ideal for handling the stresses incurred in shade sail structures.
- They come in widths up to 12.5 feet which reduces the number of panels needed for a shade sail.
- We recommend stitching with a PTFE thread, like GORE® TENARA® or Aruvo®.
A snapshot of the shade sail fabrics we carry:
- Commercial 95® 340: Great for mid-sized project designs.
- Polytex®: Features a “Raschel Knit”.
- SolaMesh®: Tested in the world’s toughest conditions.
- Comtex®: Excellent fire rating.
- Sunbrella® Contour: Legendary Sunbrella performance.
- Commercial Heavy® 430: Great for large-scale jobs.
- Architec 400®: Unique blend of fibers for maximum endurance.
- Commercial FR 300®: Flame retardant and UV resistant.
- FR Comshade®: New-and-improved version with updated materials, higher flame resistance, and stricter environmental safety.
- Commercial DualShade: Superior biaxial stability with a unique two-toned look.